In today's digital age, it's more important than ever to be mindful of your online presence and take steps to stay hidden online. With so much personal information available at our fingertips, it's easy to inadvertently share more than we intend to. From social media accounts to online shopping habits, every click and keystroke can leave a digital footprint that can be traced back to you. Whether you're concerned about privacy, security, or simply want to maintain some degree of anonymity online, taking steps to stay hidden can help protect your personal information and give you peace of mind.
Today, I want to talk about Proxychains and how to set it up on Kali Linux. Proxychains is a tool that allows you to route your network traffic through a chain of proxies. This can be useful for a variety of reasons, such as bypassing network restrictions or maintaining anonymity online.
To get started, you'll need to have Kali Linux installed on your computer. If you don't have it already, you can download it from the official Kali Linux website.
Once you have Kali Linux installed, you can install Proxychains by opening up a terminal and typing the following command:
sudo apt-get install proxychains
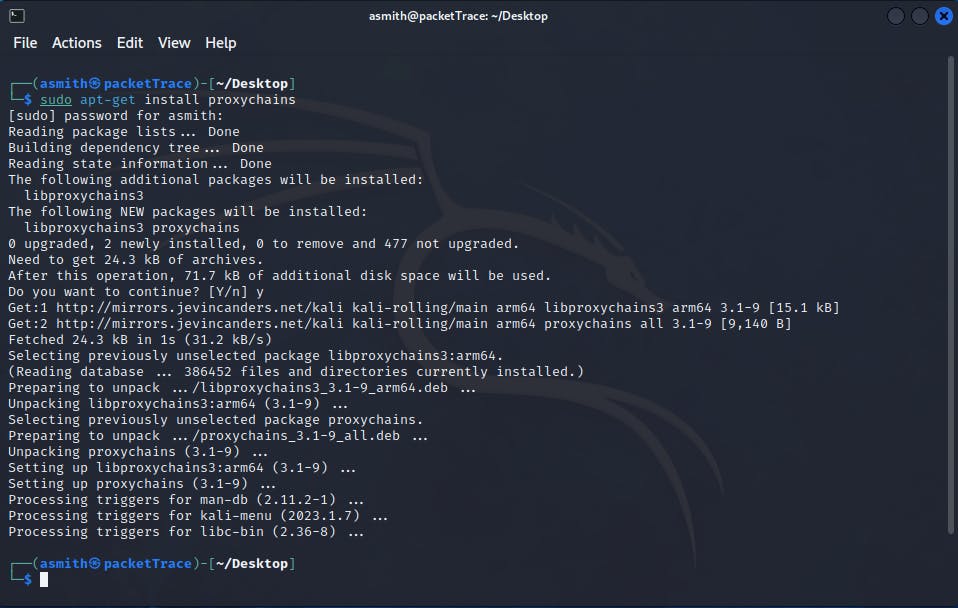
This will install Proxychains on your system. Once the installation is complete, you can configure it by editing the configuration file located at /etc/proxychains.conf.
sudo nano /etc/proxychains.conf
Open up the configuration file in a text editor and look for the line that says dynamic_chain. Uncomment this line by removing the "#" symbol at the beginning of the line. This will enable Proxychains to use a chain of proxies. Comment out the strict_chain line.
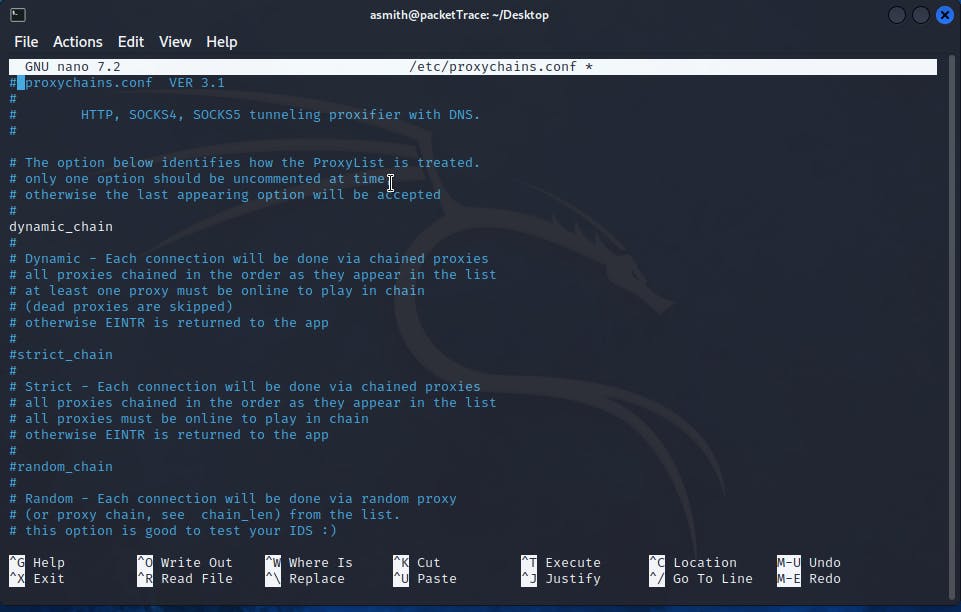
Next, you'll need to add the proxies that you want to use. You can do this by adding their IP addresses and port numbers to the configuration file. We are going to use our loopback address with a port of 9050 since this is the port that proxychains listens on by default:
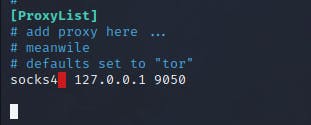
socks4 127.0.0.1 9050
You can add as many proxies as you want, and Proxychains will use them in the order that they are listed in the configuration file.
Installing Tor
Tor is a free and open-source software that helps users maintain their privacy and anonymity online by routing their internet traffic through a network of servers. It can be used to access websites that are blocked in certain countries or to protect against surveillance.
To install and enable Tor on Kali Linux, you can follow these steps:
Open the terminal and update the package list by running the command
sudo apt-get update.Install the Tor package by running the command
sudo apt-get install tor.Once the installation is complete, start the Tor service by running the command
sudo service tor start.To verify that Tor is working, you can run the command
curlhttps://check.torproject.org/. If everything is set up correctly, you should see a message that says "Congratulations. This browser is configured to use Tor."
Another way to check if the tor service is running is by typing systemctl status tor .
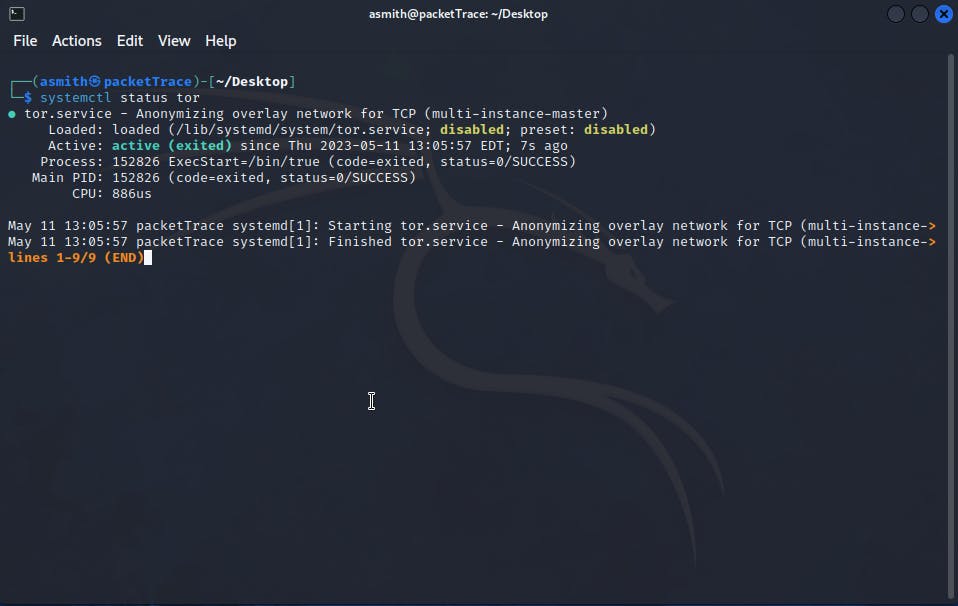
Proxychains should now be configured and ready to use, you can start it by simply typing proxychains followed by the command that you want to run. For example, if you want to run the "ping" command through Proxychains, you would type:
proxychains ping google.com
This will route your network traffic through the tor network which is a chain of proxies that you've already configured.
If we want to use our Firefox browser and run proxychains in the background we can use this command:
proxychains firefox www.google.com
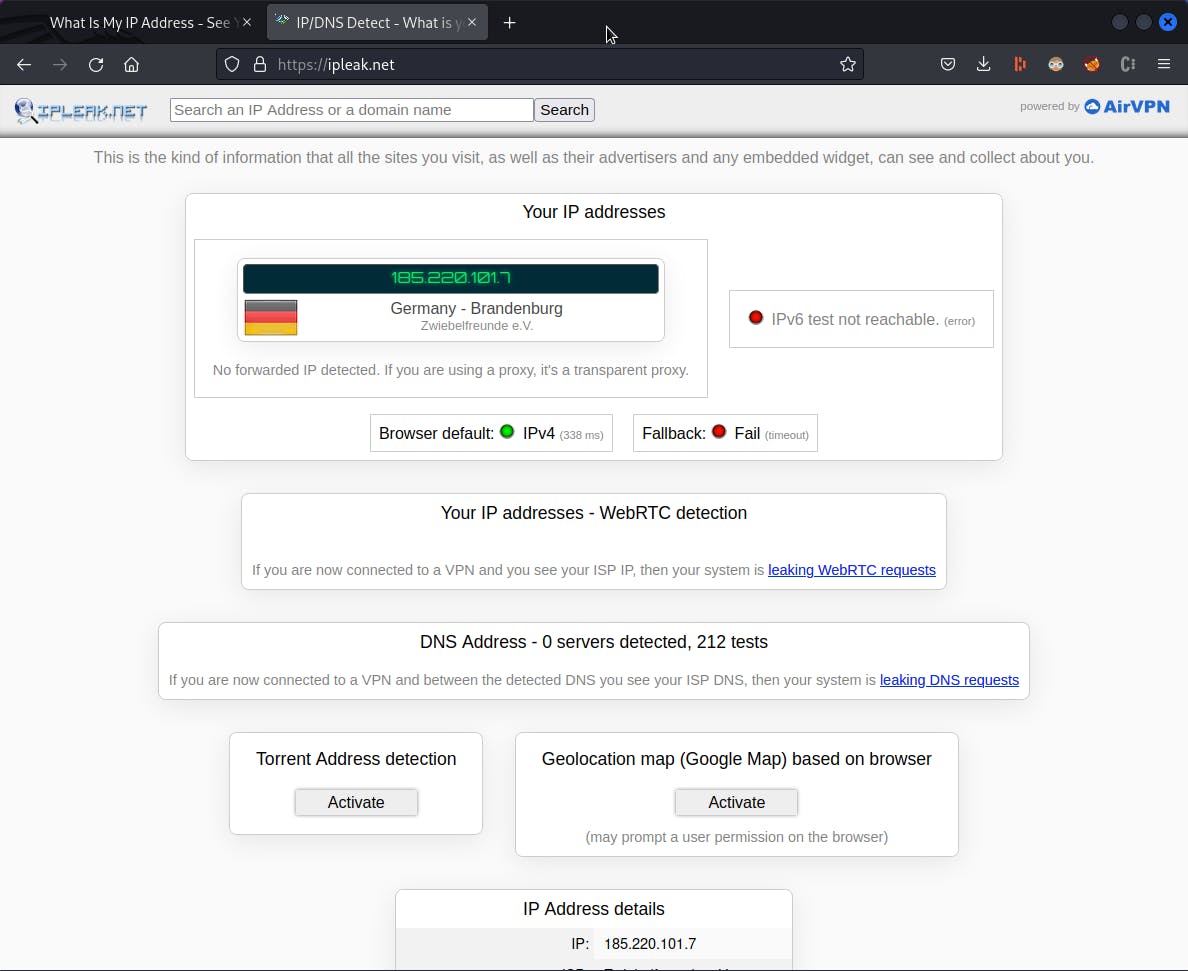
This will load google.com as usual but now we are successfully masking our IP address. Upon visiting www.ipleak.net, we will notice that our public IP address has been altered, indicating that we are presently located in Germany.
Overall, Proxychains is a powerful tool that can be useful in hiding your online activity. Just be sure to use it responsibly and be aware of its limitations. Happy hacking!

